Discovering the Tool Store
Browse the Tool Store, install a tool in one click and attach it to your Mates.
Last updated 14 days ago
The Tool Store is the catalog of ready-made tools that you can give to your Mates: connections to business apps, web search, image generation, a Python code interpreter and more. This article shows how to browse the store, install a tool in one click, and attach it to your Mates. It is for the people who manage tools in the organization.
Everyone can browse the store. Opening a tool page and installing a tool need tool-management rights: the Expert plan by default; your organization's plans may differ.
Open the Tool Store
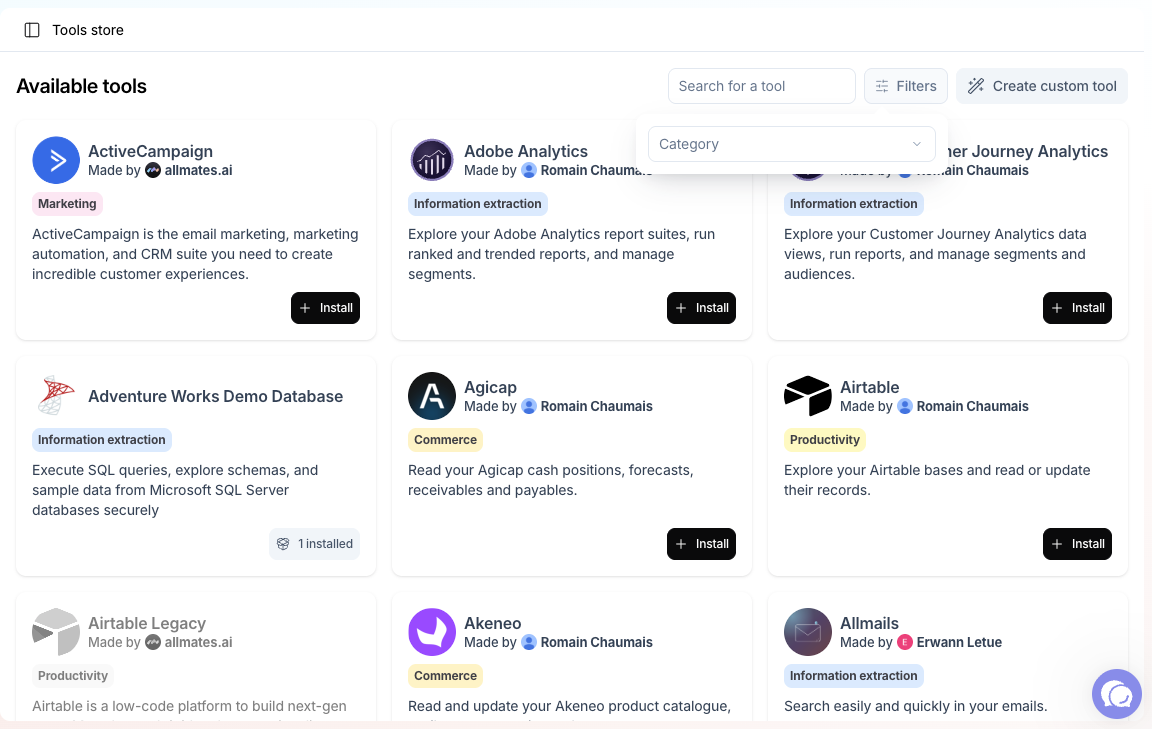
In the sidebar, open Mates & tools, then Tools Store. The Available tools list shows one card per tool, with its name, a short description and its category.
To find a tool, type in Search for a tool, or click Filters and pick a Category.
What you find in the store
Most store tools are MCP connections: ready-made links to the MCP servers of business apps, such as CRMs, databases, analytics or file storage. Other tools call a web API for you, or are built in, such as the code interpreter. The list of tools depends on your organization.
Tools are grouped in these categories:
Click a card to open the tool page. Its Overview tab describes what the tool does. Its How to use tab gives the setup steps and example requests.
Install a tool
- Click Install, on the card or at the top of the tool page.
- Most tools install at once. If a tool needs setup, the Complete required setup dialog opens: fill in only what it asks for, such as a server URL, an API key or an OAuth client, then click Install.
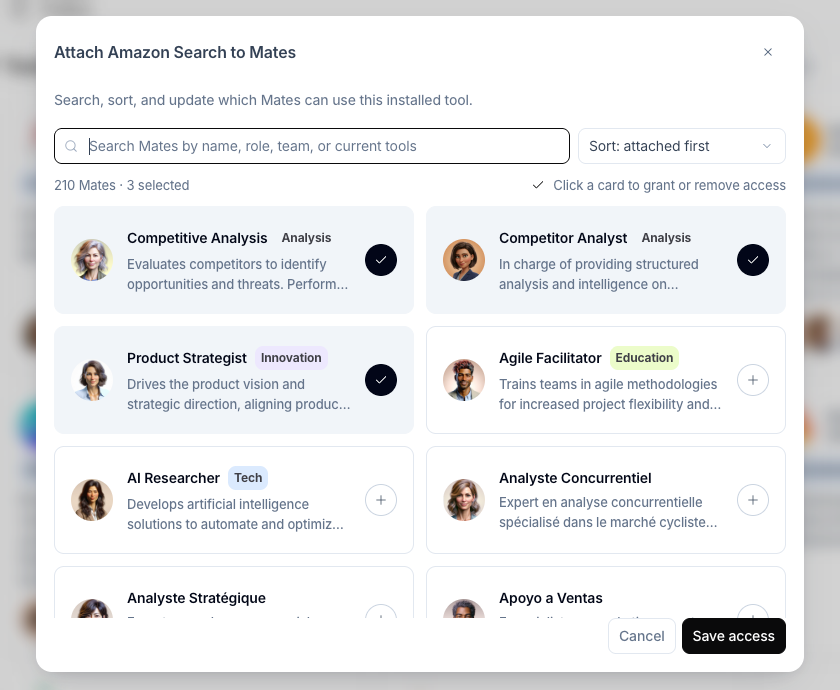
- The tool attachment dialog opens. Click the card of each Mate that should use the tool, then click Save access. You need editor rights on a Mate to attach a tool to it.
The new tool instance takes the name of the store tool. You find it in the Toolbox, where you can rename it, edit it and set who can manage it.
Attaching a tool to a Mate takes effect at once. If the Mate has unpublished draft edits, the tool change also deploys them.
Tools you already installed
When your organization has installed a tool, its card shows 1 installed or {count} installed instead of Install. Click it to open the list of instances, with the Mates attached to each one. From there you can Open instance, Manage access (attach it to Mates), Delete instance, or create a new instance of the tool.
Several instances of the same tool are useful when they need different settings: one per team, per account or per environment. Give each one a clear name.
OAuth tools
Many MCP tools sign in with OAuth. By default, each member connects their own account the first time a Mate needs the tool. A tool manager can also choose one shared account for everyone. See "Connecting Apps with MCP Tools (OAuth)" and "Personal and shared tool authentication".
Build your own tool
If the store has no tool for your service, click Create custom tool. You can connect any MCP server by its URL, or any REST API with an OpenAPI schema. See "Deploying a Custom MCP Server in Your Organization" and "Master the REST API Tool".
Deprecated tools
When a Store tool is outdated, it is marked as deprecated, usually with a replacement tool. A deprecated tool keeps working for the Mates that use it, but it can be removed in the future. Move your Mates to the replacement as soon as you can.
How you recognize a deprecated tool
- In the Tool Store, the tool card shows a Deprecated tag. You cannot install a deprecated tool that your organization has not installed yet.
- In the Toolbox, the tool instance page shows the banner "This tool is deprecated. Consider using the recommended replacement." When the tool has a replacement, the banner adds the link Replaced by followed by the name of the replacement. Click it to open the replacement in the Tool Store.
Move your Mates to the replacement
You need to be able to manage tools (Expert plan by default; your organization's plans may differ). The Tool Store card of the deprecated tool guides you in two steps.
Step 1: install the replacement. If your organization has not installed the replacement yet, the card of the deprecated tool shows an action to install its replacement.
- Click the action to install the replacement.
- Complete the setup of the replacement, as for any Store tool.
Step 2: switch the Mates. Once the replacement is installed, the card of the deprecated tool shows Switch Mates.
- Click Switch Mates.
- If your organization has several instances of the replacement, choose one in Choose replacement instance.
- The window for switching Mates to the replacement lists every Mate that uses the deprecated tool, across all its instances. Select the Mates to move.
- Click Switch Mates.
The selected Mates stop using the deprecated tool and use the replacement instance. The message "Mates switched" confirms the change.
Good to know
- While a Mate still uses a deprecated tool, saving a change to that Mate's configuration fails with an error that names the replacement tool. Switch the Mate to the replacement first, then make your change.
- The Switch Mates window lists only the Mates you can edit as selectable. For the other Mates, it says that they need a manual or admin replacement. Ask an admin of those Mates, or replace the tool on each Mate yourself. See "Managing a Mate's Tools: Attaching and Detaching Capabilities".
- When your organization no longer has any instance of the deprecated tool and has installed the replacement, the deprecated tool disappears from the Tool Store.
- If no Mate uses the deprecated tool any more, Switch Mates does not show. You can delete the deprecated instances from the Toolbox.
- A deprecated tool without a named replacement shows "Use the recommended replacement instead". Look in the Tool Store for a tool that does the same job.
How to choose a tool
- Start from the task. What should the Mate do, how often, and with which data?
- Read the Overview and How to use tabs. They list what the tool needs: an account, an API key, an OAuth client.
- Prefer an MCP connection when the app offers one. It needs no schema and follows the app's updates.
- Mind whose identity the tool uses. A personal connection keeps each member's permissions. A shared account shows everyone the same data.
- Running a tool on your own vendor key is available with the Enterprise offer. See "Using your own keys for tools".
- Test before you roll out. Attach the tool to one test Mate, try a few requests, then attach it to the Mates that need it.
Related articles
Was this helpful?
Still need help? Ask the team