Managing your organization's models
Connect a provider with your own key, add models to your organization, set the default model and remove the models nobody uses.
Last updated About 13 hours ago
This article explains how to choose the models that your Mates can use. You add models to the organization, set the default model and remove the models nobody uses. It is for organization Owners and Admins. The access depends on this role, not on a plan.
Open Models management
- At the top of the sidebar, click your organization's name.
- Click Settings.
- Open the Models management tab.
The tab has the Connections, Models and Settings sub-tabs:
- Models: the models that your Mates can use.
- Settings: the Default model and the Fallback model.
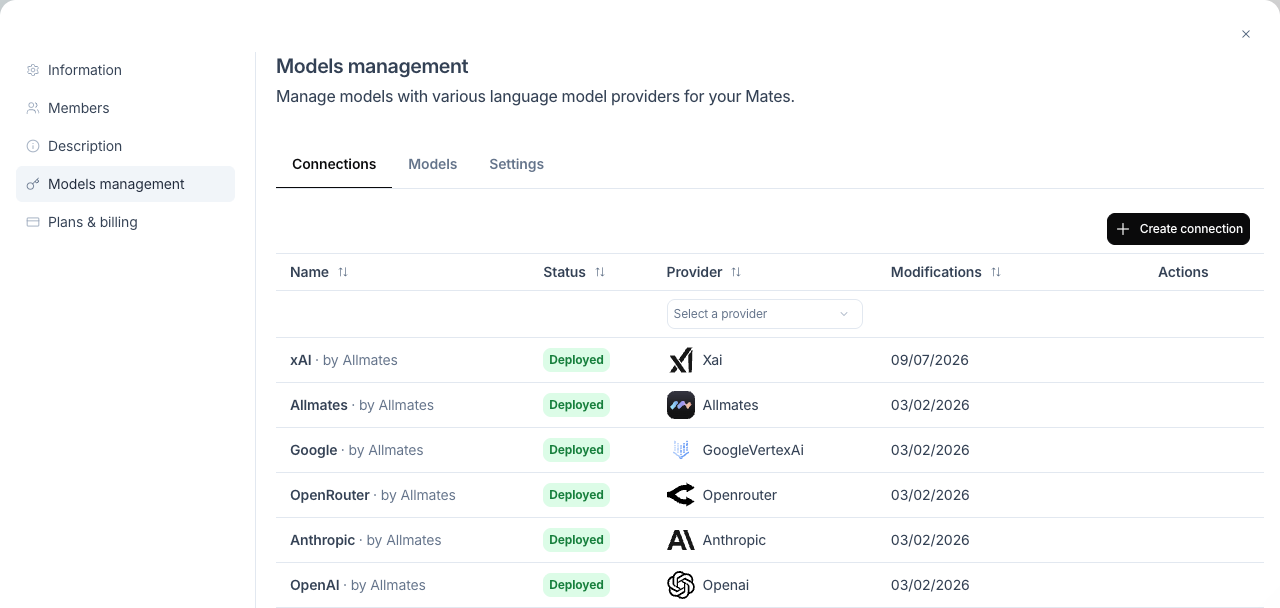
Connections
Your organization gets ready-to-use connections. Each one gives access to the models of one or more makers.
Usage of these models consumes your organization's credits. See "Understanding credits".
A connection does not give models to your Mates by itself. You add each model that you want, as explained in "Add a model". Only the three Allmates models (Allmates small, Allmates medium and Allmates large) are already added. See "Current lineup" for the models of each connection.
Using your own model provider account is available with the Enterprise offer. See "Using your own model provider keys (BYOK)".
Add a model
- Open the Models sub-tab.
- Click Create model. The New model dialog opens.
- Enter a Name. Mate editors see this name in the Model list of a Mate.
- In Connection, pick a connection.
- In Physical model, pick the model. The list shows the models that the connection offers. It does not offer deprecated models.
- Click Save.
The model shows with the Deployed status, and Mate editors can now pick it.
If you pick a "Latest" physical model, give your model a name without a version number, for example "Claude Opus Latest". The name that you enter does not change when the "Latest" model moves to a new version. See "Current lineup".
Set the default model
- Open the Settings sub-tab.
- In Default model, pick a model.
- Click Save.
Out of the box, the default model is Allmates medium.
A Mate can follow the default model. On a Mate's Parameters tab, the first option of the Model list carries the Default tag. A Mate set to this option switches when you change the default model. A Mate created from the Automatic tab starts on the default model.
Below the field, a line shows how many Mates follow the default model, for example "3 Mates follow the default model and will switch with it."
The Fallback model field sits on the same sub-tab. See "Model Fallback".
Track usage and remove models
In the Models sub-tab:
- The Mates column shows how many Mates use each model. On the default model, hover the number to see how many Mates chose the model and how many follow the default.
- The Default tag marks the default model. The Fallback tag marks the fallback model. The Deprecated tag marks a model on its way out.
To remove a model:
- Click Disable the model in its row. The status changes to Disabled, and Mate editors can no longer pick the model. To undo, click Restore the model.
- Click Delete the model, then Delete model to confirm. The model disappears from every model picker.
You can delete a model only when no Mate uses it and when it is neither the default nor the fallback model. Otherwise, the delete button stays greyed out and its tooltip gives the reason, for example "Cannot delete: 2 Mates use this model. Move those Mates to another model first."
Good to know
- The three Allmates models cannot be edited, disabled or deleted.
- If the usage cannot be loaded, the delete buttons stay greyed out. Reopen Models management to try again.
- Your organization's list of connections and models may differ.