Managing a Mate's Tools: Attaching and Detaching Capabilities
Attach and detach tools on a Mate's Tools tab, and know when a tool change reaches conversations.
Last updated 10 days ago
Tools let a Mate act beyond conversation: search the web, generate images, read your apps, call your APIs. You give a Mate a tool on its Tools tab. This article shows how to attach a tool, how to remove one, and when the change reaches conversations.
To see the Tools tab, you need the tool management permission. To change a Mate's tools, you also need the Owner or Admin role on the Mate. In the default plan catalog, tool and Mate management come with the Expert plan. Your organization's plans may differ.
Open the Tools tab
- In the sidebar, click Mates & tools, then Organization's Mates.
- Click the Mate.
- Open the Tools tab.
The tab lists the tools attached to the Mate. Each card shows the tool's name, a short description and its category. A tool marked Deprecated will be removed from the catalog; replace it when you can. Click a card to open the tool's page.
If the Mate has no tool, the tab shows "No tool attached to this Mate".
Attach a tool
- Click Add a tool. The Manage tools for Mate name dialog opens.
- Search the tools by name or category.
- Click a card. What happens depends on the tool's status on the card:
- 1 installed: the tool is selected.
- N installed: your organization has several instances of this tool. A dialog asks you to choose the instance this Mate uses. You can also click Install another.
- Not installed: the platform installs the tool, then selects it.
- Setup required: a setup dialog opens first, for example to connect an account or enter a key. When the setup is done, the tool is selected.
- Selected cards show Selected. Click a selected card again to remove it from the selection.
- Click Save access.
An "Access saved" message confirms the change.
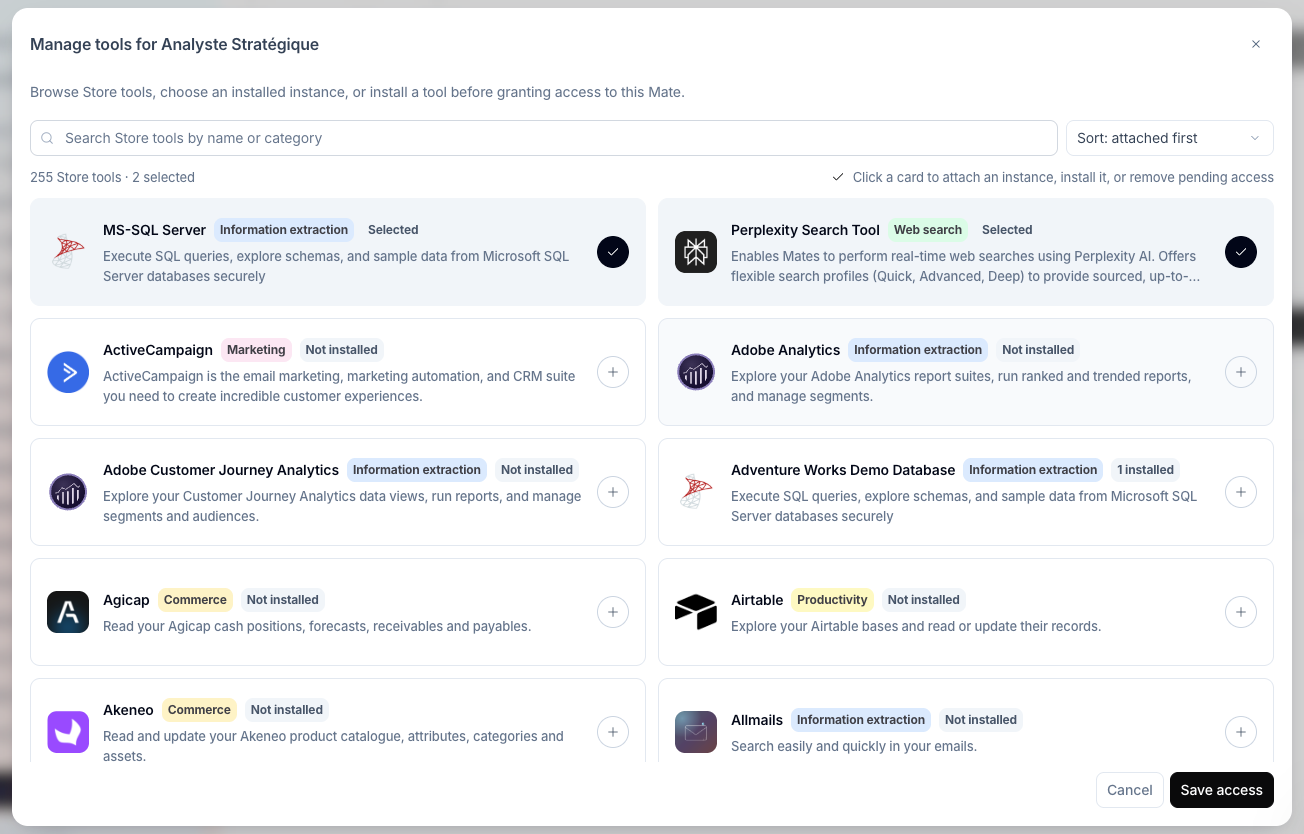
The dialog also lists the custom tools that your organization built. Click one to select it.
Detach a tool
- On the Tools tab, find the tool.
- Click the trash icon on its card.
The tool is removed from this Mate at once, with no confirmation. It stays in your organization's Toolbox, and other Mates keep it.
You can also detach tools in the Add a tool dialog: click a selected card to clear it, then click Save access.
When the change applies
A tool change applies at once. You do not need to click Update.
A tool change also publishes the Mate's pending changes. If you edited the instructions, the model or other settings without clicking Update, attaching or detaching a tool applies those edits too. If you are not ready to publish them, change the tools later.
Good to know
- A Mate uses one instance of each Store tool. When you choose another instance of the same tool, it replaces the previous one.
- A deprecated tool cannot be attached again once you remove it.
- Installing a tool from this dialog needs the tool management permission. Without it, tools that are not installed cannot be selected.
Related articles
Was this helpful?
Still need help? Ask the team